Rappelling with just a rope is not easy, but it can be done.
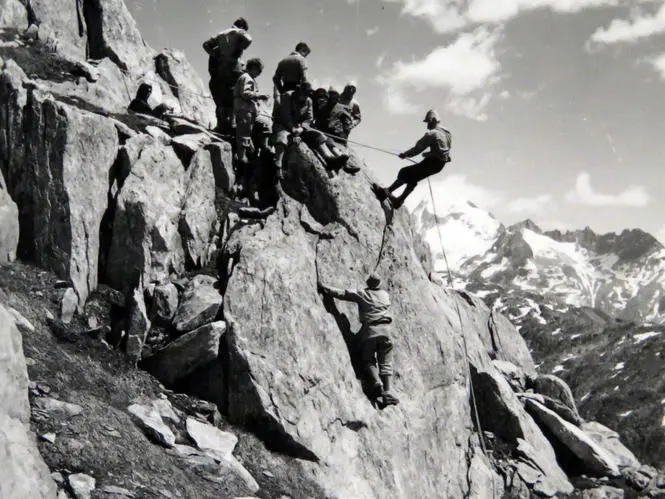
These days, those of us who decide to practice climbing and rappelling have plenty of gear to rely on. We’re talking about harnesses, ropes, belay devices, helmets, and sturdy anchors. However, people have been rappelling down the steepest cliffs and waterfalls for hundreds of years. Actually, the original rappelling technique is attributed to Jean Charlet-Straton, who was a Chamonix guide. He lived from 1840–1925, and he first perfected his rappelling method in 1879 at Petit Dru.
By the way, if you’re looking for a list of sturdy and dependable rappelling ropes, check out my complete guide right here.
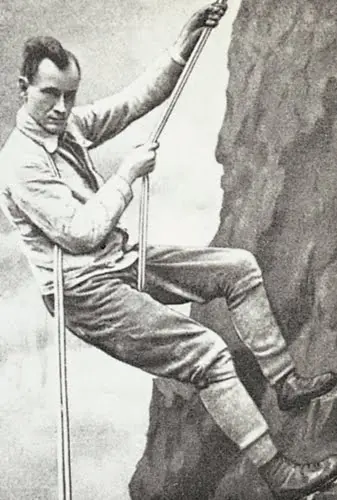
It’s not hard to imagine that rappelling equipment was basically nonexistent in 1879, but somehow, Jean managed to rappel safely after a few failed attempts. Most likely, he relied on a simple yet sturdy rope to reach the ground. Many years later, a mountaineer named Hans Dülfer devised the body rappel or the Dülfersitz, which is a classic, non-mechanical rappelling technique that involves wrapping a rope around your body in order to control your descent.
Is the Dülfersitz Method still popular?
Not so much, but that’s mainly due to the introduction of belay devices, which are so much better at controlling ropes. Still, if you do find yourself in an emergency situation, rappelling with just a rope is definitely doable, as long as you perform the technique correctly. The Dülfersitz is mostly used in rock climbing and mountaineering, and it basically involves coiling the rope around your body, which allows you to control your descent. You will be able to slow yourself down by creating friction but be warned: things can get pretty scary fast.
Using this method, the rope will not suffer much wear, as it is not subjected to concentrated forces. The downside is that friction creates heat, which can damage clothing or potentially harm you, especially in the shoulder and thigh areas.
How to rappel with just a rope: step-by-step.
Even if you don’t go out of your way to practice the body rappel, it’s still a good idea to know the basics. You never know when you might need to do it, after all.
1. Choose a rope.
The first thing you need to do is choose your rope, which should be at least 8mm thick and about 98 feet long. Ideally, you’ll have to find a sweet spot between a rope that’s thick enough and one that’s light enough to rappel comfortably. Keep in mind that you don’t need a dynamic rope for a body rappel. A static rope will do just fine, such as the Aoneky 10 mm Static Outdoor Rock Climbing Rope from Amazon.
2. Lower your backpack.
Next up, you’ll want to get rid of your extra gear, and the best way to lower your backpack is to thread the rope through the shoulder straps until it’s centered. Afterward, just lower the pack by holding both ends until it reaches the bottom. Don’t forget to bring the rope back up by pulling on one end!
3. Set the anchor.
Now you’ll need to set your anchor, but this step varies greatly depending on your surroundings. If you’re in a rocky area, double-check the rock horns and boulders. Make sure that they’re sturdy enough and that the rope won’t slide under or over them, as this could cost you greatly. In icy regions, you’ll need to create a teardrop-shaped trench, also known as a bollard.
Thinking about using trees? Make sure that they are at least six inches in diameter, and that they’re strongly rooted into the ground. As for the rope, loop the middle part around the anchor, coil both ends and throw it over the cliff. The ends should reach the bottom of the cliff without any issues.
4. Wrapping the rope.
Grab the two rope lengths from around the anchor, a straddle them while facing uphill. Hold on tight to both ropes and pull them around your hip, through your legs, and over your shoulder. This should be your nondominant shoulder preferably. Work the rope around the back of your neck and down to your dominant arm. Now trust that the friction of the rope around your body will slow down your descent. Things can get a bit uncomfortable as you lower yourself down, but it all depends on your speed. Take your time and descend slowly in order to avoid injury.
5. The descent itself.
The descent involves an athletic pose with your knees bent and your feet resting shoulder-width apart from each other. The downhill part of the rope should be handled by your dominant hand, while your other hand should rest on the upper part of the rope for balance. Wearing gloves is a must-have if you’re rappelling with a rope, as you’re controlling your speed by feeding the rope through your dominant hand. I probably shouldn’t have to tell you this, but if you let go of the rope, you will fall. Assuming that you reached down safely, pull the rope on one end in order to retrieve it.
Apart from the Dülfersitz, there is one other rappelling technique that you should know about, namely the South African Rappel.
How is the South African Rappel different?
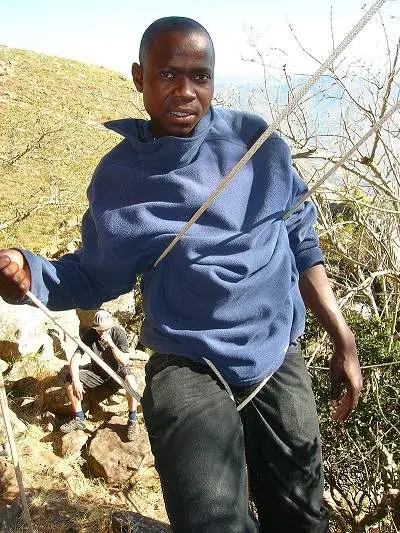
This rappelling technique was developed by a South African mountaineering instructor named Andrew Friedemann. He created it in 2000 at a Mountain Leader course in Mooi River, as he thought that the classic rappelling technique taught there was too difficult and too risky. He decided to come up with a solution that would eliminate rope burn while improving control. Moreover, the South African Rappel presents a much lower risk of toppling over backward.
Later in 2000, in Chamonix, France, the new technique was analyzed during the UIAA International Training Standards Working group seminar. The seminar’s members issued the name, and none of them have ever seen the method before at that time. Even though it relies on the same basic principles as the Dülfersitz method, the South African Rappel has a series of advantages:
- The user can have one hand completely free during the descent. Classic rappelling techniques require both hands to be on the rope in order to prevent toppling backward. This means that the user can better focus on the descent itself.
- Toppling is further prevented by the rope alignment. The rope goes around and crosses over the back below the armpits. Therefore, the rappeller is supported upright, which means that there’s a smaller chance of falling backward.
- Last but not least friction covers a larger surface area. This reduces overall discomfort during descent while providing more control.
As I mentioned before, classic rappelling techniques with just a rope are mostly obsolete these days. However, any serious rappelling enthusiasts should know how to perform an emergency rappel. Walking parties still use these techniques sometimes, as they don’t really carry any modern equipment with them during their trips apart from a rope. If you know any other ways to rappel with just a rope, feel free to share and I’ll be happy to include them.


