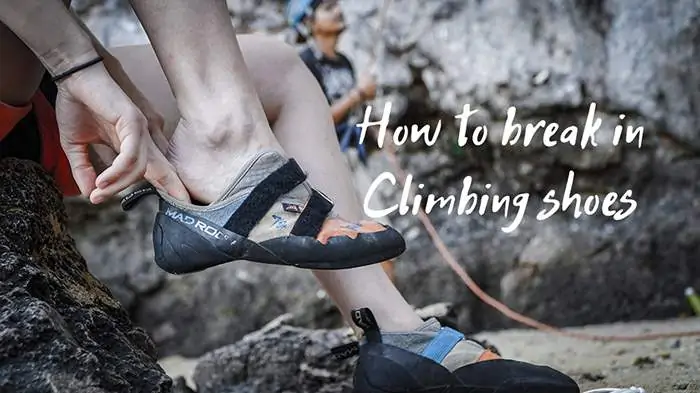
It takes a bit of practice and patience to break in climbing shoes, but that doesn’t mean that the experience needs to be painful or too difficult. On the other hand, fail to break them in properly and you’re in for a world of hurt. It’s worth noting that most climbing shoes have their own break-in periods, and they will break in naturally as you use them. Still, those first few climbs can be rather brutal, and it might seem like forever until they’re finally comfortable to wear.
Fortunately, there are some ways to shorten this break-in period for climbing shoes. Generally speaking, the main goal is loosening up the shoe so that it’s more comfortable to wear. However, depending on the shoe’s material, some parts of it might not be possible to stretch out at all, while some will stretch for a little while and then just go back to their initial shape, causing the same tightness.
Synthetic shoes are notorious for their lack of flexibility. You won’t be able to stretch those out too much no matter how hard you try. Actually, you might end up breaking them altogether if you try too hard. Climbing shoes with leather uppers though, those you can break in every time, as the upper material is flexible and eager to adapt to your foot shape and size. Also, If you need a helping hand choosing the right pair of climbing shoes, just have a look at my guide right here.
That being said, let’s go over the main methods for breaking in climbing shoes!
Method 1: The Hair Dryer.
This is one of the less invasive ways of breaking in your climbing shoes, but it’s also a bit of work because you need to do everything manually. Still, if you’re not too rough on the shoes, you can end up with a looser fit in no time at all without worrying about damaging them in any way. Here’s how I do it:
- First off, get your hands on as many pairs of socks as possible and roll them up nicely. You’ll need these to make some room in the shoe. Get a hairdryer too, as you’ll need to warm up the shoes at some point.
- Stuff the socks inside the shoe. Make sure to fit as many as you can in there, and don’t leave any room if you can. This will help the shoe expand as it heats up.
- Once the socks are firmly inside the shoe, use a hairdryer or blow dryer to heat up the shoes gradually for a few minutes. Make sure to keep an adequate distance between the shoe and the dryer, as you don’t want to burn the upper or melt away any plastic bits.
- You should mainly focus on the leather parts of the climbing shoe, as the heat will cause them to expand. The socks inside the shoe will push outwards and facilitate this expansion.
- If they get noticeably loose, put another pair of socks in there and repeat the process. Afterward, take the socks out and bend the shoe in every direction. Carefully, though, as you don’t want to damage anything.
- Climbing shoes are tough, and they should be able to withstand this procedure without any issues. You can repeat it as necessary for a few days, but I noticed some looseness after the first try and was quite satisfied with the result.
Method 2: The Ice Pack.
This is one of the most popular ways of loosening up climbing shoes. It also applies pressure from within the shoe outwards in order to achieve a stretch, but this time around, we’re going to use a cold environment instead of a hot one. Here’s how to do it properly.
- Find two plastic bags, the ones you use for sandwiches, and fill them up with water. Close them tightly in order to make sure that no water will come out as you place them inside the climbing shoes.
- Place the bags in the shoes as tightly as you can without causing a spill. You should generally go for a plastic bag that has the same size as your foot once filled up. The idea is to “fill up the shoes with water” without actually getting them wet.
- Lace-up loosely around the bags.
- Place the shoes inside a freezer and leave them in there overnight or for about eight hours. Make sure to take them out after 12 hours max otherwise you risk damaging them.
- As water freezes, it expands, it increases in volume. This causes the leather upper to stretch, thus breaking in the shoes and ensuring more comfort for the wearer.
- After you take the climbing shoes out of the freezer, leave them be for about 30 minutes before taking the water bags out.
- Once the bags are out, leave the shoes to thaw naturally for a few hours. You shouldn’t put them on your feet until they feel normal to the touch (warmish).
- Put the shoes on and test out the new fit. Walk around the house, wiggle your toes. You’ll definitely notice the difference!
Method 3: The Shower.
This is a rather unconventional way of breaking in climbing shoes, but it does work as it has been used for decades. The idea is that hot water will make the shoes expand and break-in easier. The drawback is that you might end up with quite a bit of color on your feet. This is nothing to worry about – it’s just extra dye.
- Put on a pair of thick socks for the best results. You can also use regular socks, but the thicker they are, the more they will help the shoe expand.
- Put on your climbing shoes and lace them up as if you’d get ready for a climb.
- Hop into the shower and run hot water over your shoes for a few minutes. The hotter the water, the more your shoes will expand, but don’t overdo it as scalding hot water can damage your skin.
- Make sure to move around in order to let the water get inside the shoe. Wiggle your toes too in order to make more room in the toe box.
- As you move around, take care not to slip. Put a towel on the shower floor to make things safer.
- You don’t have to take a full shower, as you only need to soak your shoes in order for this to work. However, you CAN take a shower with your climbing shoes on if you want to do it that way. Just make sure to rinse them well afterward. Shampoo and shower gels were not designed to clean climbing shoes.
- If you can, you should perform a climb in your shoes before they dry off. You can do this at a climbing gym or at home if you have your own climbing wall. If you go to a climbing gym, though, make sure to talk to someone over there and make sure it’s ok to use damp shoes. It’s important to move around in them as much as possible while they are wet, as that’s when the stretching happens.
- Once you’re done, remove the shoes and stuff them with paper or dry socks in order to help the drying process.
- Don’t toss the climbing shoes in the dryer, as that will only cause them to shrink back up.
Method 4: Plastic Bags.
Some climbers have reported success with this method, but there are a few things you should know before you try it out. You will stretch your climbing shoes naturally as you climb or walk in them. You can walk around the house, take them on a short jog, or just wear them as you take care of your chores. You can also wear them at the climbing gym or outdoors, but you will feel pain and you will likely hurt your feet in the process. Fortunately, you can minimize this pain using plastic bags.
- One method to avoid pain while breaking in your climbing shoes naturally is to use sandwich bags or plastic bags.
- Just place the bags on your feet before sliding your shoes on. The bags will create a smoother surface and will eliminate some of the friction as your foot moves around in the shoe.
- One thing you need to take note of is that plastic bags restrict breathability. Therefore, you should only use this method for short sessions, on and off if possible.
- Your feet will likely feel more comfortable within the shoe, but the lack of airflow could be problematic. You could poke some holes in the bag for improved breathability, but that will only get you so far.
Conclusion.
in order to make things easier for you, you should ideally find climbing shoes that fit. They should provide a snug fit without being too tight or too loose, as each situation could cause its own set of problems. I know it can be challenging to find a pair that fits just right, but keep in mind that using your street size as a reference is only the beginning.
You need to take into account your foot shape, your experience as a climber, and how long you expect your climb to be. Also, feet will swell up during the day – up to half a size in most cases. Using climbing shoes made out of leather will give you that extra flexibility to break them in and achieve a comfortable fit. If you know any other methods to break in climbing shoes, just let me know and I’ll update this guide accordingly.


