

")
")


")


Ski rappelling is challenging, but it’s not impossible.
Many climbers will agree that rappelling is an unpleasant yet necessary part of any climbing trip. And while some of them view this activity with fear and worry, it’s actually not that dangerous or difficult as long as it’s performed properly and in the right conditions. Notice that I said “right conditions” back there, as snow and slippery surfaces can transform rappelling into a truly scary task. Yet that’s exactly what we’re about to dive into today, so buckle up!
Ski rappelling can be performed over rough terrain. Skiers decide to rappel when they encounter very rough patches of terrain, usually on very steep slopes. The act of performing a ski rappel is considerably more dangerous when compared to a regular one, and many things need to be taken into account before attempting the act itself.
As you swap over from skiing to rappelling, make sure to follow conventional mountaineering protocols and check the quality of your anchors. Moreover, you should always stay attached to your anchor while maneuvering the rope, and you should always set up a rappel backup.
Speaking of rope, make sure to check out my detailed guide on how to choose an ideal rappelling rope, especially if you plan on performing a ski rappel. Since outdoor conditions are harsh and cold on the ski slopes, try to pick out the most durable rope you can find, and one that’s particularly tried and tested in freezing temperatures.
What to consider before attempting a ski rappel.
I’m going to tell you exactly what happened during my first ski rappelling attempt, and what I wish I knew beforehand so that you won’t make the same mistakes. It’s worth noting that I don’t ski very often, but I’m still experienced enough to tackle a rather unwelcoming slope.
I was warned beforehand that we might have to rappel at some point, which is why I brought my rappelling gear with me. I was already wearing my harness, and I had my belay device and carabiners in my backpack. The rope I prepared was 10mm in width, and it was quite heavy, but I wanted something secure and durable for this particular trip.
Sure enough, our path eventually led to a steep rocky slope that was impossible to traverse with skis. Therefore, we decided to rappel over it and continue our skiing trip at the base of the cliff. The problem was that I was wearing my skiing gear, which includes cumbersome skis. At first, I attempted to rappel without actually taking off my skis. Since I nearly broke one of them just a few feet into my rappel, I decided to take them off and give it another try.
- I would never recommend attempting a ski rappel while actually wearing skis. Find a way to carry them with you, or just lower your equipment to the base of the cliff if it’s safe to do so.
- It’s often necessary to create an improvised anchor from a natural rock horn while ski rappelling. Make sure to belay down and test the rock horn thoroughly beforehand. Using a rock as an anchor is always risky, so make sure to pick the sturdiest one.
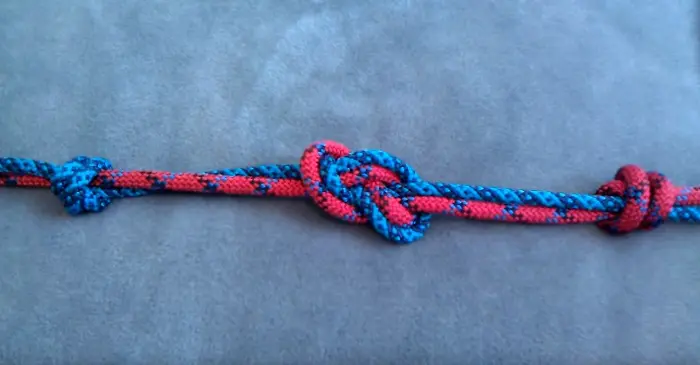
- In order to tie up a cord sling on the rock horn, we used a double fisherman’s knot. Just in case you don’t know how to tie one, I’ve written a detailed guide that explains how to tie the most important knots for rappelling.
Should you tie a knot at the end of the rope for ski rappelling?
A knot at the end of the rope usually improves safety, as it prevents the climber from rappelling off the end of the rope. However, in some cases, tying this knot can do more harm than good.
Generally speaking, when you’re rappelling against low-angle terrain, it’s sometimes better to not tie a knot at the end of the rope. In this situation, the knot can increase the risk of getting the rope stuck in the various cracks and blocks present on the rock face. In this case, the skier would be exposed to a great amount of risk as he or she would proceed to free the rope.
At any rate, the decision rests with the skiers, as they are the ones who need to weigh in all of the potential risks and hazards. In my case, we also decided against tying a knot at the end of the rope. Believe me when I say that it did make my experience a lot more stressful, but everything worked out in the end.
The Munter Hitch – a very important part of ski rappelling.

Before you even think about attempting a ski rappel, you should definitely learn everything you can about the Munter Hitch and how to use it. I’ve already covered this emergency device before in my article about belay devices and how they are made, but I’m going to tell you a few things about it now anyway.
Basically, the Munter Hitch is a very strong knot that can be used with a locking carabiner in order to rappel and belay. While it’s not exactly as safe as a conventional belay device, many climbers still used it to this day with great success. The Munter Hitch works best with pear-shaped carabiners, but make sure to only use it with locking carabiners. Also, please check that the part of the rope carrying the load is always next to the spine of the carabiner while belaying.
The bad part about the Munter Hitch is that it can cause twists or kinks in the rope, particularly if you’re doing a sequence of rappels. For a single, short ski rappel, though, it will work well. Tying a Munter Hitch is easy enough to learn, fortunately.
- Create a loop in the rope and proceed to slip that loop into the locking carabiner. The form a second loop using the line crossing found opposite the first loop.
- Now cross this second loop into the carabiner and lock the carabiner.
- Again, check if the piece of rope carrying the load sits next to the carabiner’s spine.
Since this is a very important knot, and since your life might depend on it, you can also watch the video below in order to get a better grasp on the technique.
The ski rappel is complete. What to do now?
After you have completed your ski rappel, all that’s left to do is to retrieve your rope and pack it up nicely so that it will be ready for use again at a moment’s notice. A carabiner placed at the end of the rope should remain accessible either on your harness or pack.
After you have traversed the unskiable part of the slope, you can equip your skiing gear once more and continue your descent. Hopefully, you’ll only encounter one or two difficult patches of terrain during your skiing trips. Even though ski rappelling can take quite a bit of time, it’s always a good idea to do it properly and without rushing through the steps.
Since snow and potentially ice are involved, ski rappelling is scarier and more dangerous than waterfall rappelling or regular rappelling off the face of a dry cliff. Even though technically you could probably perform a ski rappel on your own, I think you should always have a partner with you, just to be on the safe side and to help each other out. It’s also more fun this way!
Conclusion.
As I said at the beginning of this article, ski rappelling is dangerous and difficult, but it’s definitely not impossible. As long as you pick the right gear and use the right knots, you’ll be able to carry on with your skiing trip no matter what nature throws in front of you.
As a rule of thumb, I’d usually avoid skiing trails that include unskiable terrain. Moreover, I’d scout the terrain beforehand using a high-quality drone, but that’s a story for another day.
If there’s absolutely no way of avoiding it, and if you can’t reach your destination otherwise, ski rappelling will get you where you need to go, albeit with a heavy dose of adrenaline in the mix.


