

")
")


")


Today we talk about the Swiss Seat – the oldest emergency rappelling harness.
I just can’t stop talking about rappelling and climbing safety lately. I just feel that it’s the most important thing to consider for any climber, no matter his experience level. So as I was thinking about safety tips and what I should write about, I suddenly remembered the Swiss Seat and its incredible life-saving potential.
It’s worth noting that this emergency rappelling harness is not exactly the most popular nowadays, as many people just rely on regular rappelling harnesses. By the way, if you’d like to know more about rappelling harnesses and how you should go about choosing one, make sure to visit my extensive guide about harnesses right here. But let’s say that you don’t have a harness equipped and you suddenly find yourself in need to perform an emergency rappel.
The Swiss Seat is one of the oldest emergency rappelling knots, and while it’s definitely not as safe as a conventional harness, it has the potential to save your life. Tying a Swiss Seat is not exactly rocket science, but get one part wrong and you could end up in a bad way.
What is a Swiss Seat anyway?
It’s difficult to find out where the Swiss Seat originated, but I’d say that the technique is at least a few centuries old. Before modern rappelling equipment became standard, climbers had to get creative if they wanted to come down safely. Of course, some rappelling techniques surfaced, some of which relied on nothing more than just a rope. You can find out more about these techniques in the rappelling rope guide I wrote not too long ago. Make sure to check it out if you’re interested in the subject.
While climbers experimented with various webbing-based harnesses, two of them stood out from the rest. I’m talking about the Swiss Seat and the Swami Belt, each featuring their own drawbacks and advantages. The Swiss Seat eventually overtook the Swami Belt in terms of popularity, but that doesn’t mean that the Swami Belt just faded out of existence.
What is the difference between a Swiss Seat and a Swami Belt?
At a glance, the Swiss Seat appears considerably more comfortable than the Swami Belt, and it’s probably more reliable overall. There are a few reasons why some climbers decided to stick with the Swami Belt, though:
- The Swami Belt is probably better at distributing force, but it all comes down to how hard you fall and the type of rope/webbing that you’re using.
- Its point of pull is situated above the wearer’s center of gravity, which makes it easier for him or her to stay upright during a fall.
- Some climbers swear that the Swami is easier to tie because it requires multiple wraps around the waist.
- If you are using 2″ tubular webbing, the Swami is lighter and less bulky when compared to a Swiss Seat.
In terms of design, the differences are rather obvious. During a fall, the Seat distributes most of the force on the wearer’s legs, while the Belt distributes it around the waistline. Whether you’d prefer one or the other is ultimately up to you.
How do you tie a Swiss Seat (aka a rappel seat)?
Basically, you should always carry around a simple survival kit with a carabiner and a 12-foot section of rope. These are the main ingredients, so to speak, for a basic rappel seat or emergency rappelling harness. It’s worth noting that if your waist size is larger than 32″, you’ll probably need a bit more rope. Therefore, practicing tying the rappel seat and knowing exactly how much rope you need for your body measurements is very important. Moreover, always make sure that there’s enough rope leftover to back up the Swiss Seat’s square knot.
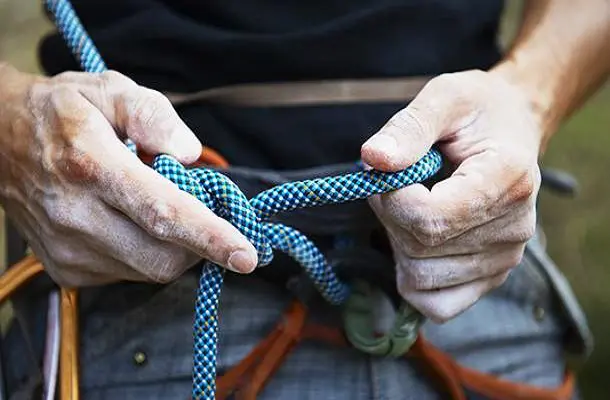
Let’s move on to the actual steps:
- The first thing you need to do is to locate the center of the rope as best you can.
- Now take the bight of the center and hold it against your left hip (assuming you’re right-handed). When you end up tying the final square knot, you want it to be on the opposite side of your rappelling brake hand.
- You can now drop the bight and wrap the rope around your waist. One end of the rope should be longer than the other at this point.
- Create an overhand knot, as well as a consecutive second wrap on either side. Make sure to let the running ends hang down freely.
- Take the running ends, pull them through your legs and around the backside. You can even squat down to tighten everything up.
- Each side should be fed up and behind the waist wrap in order to create a half hitch to lock.
- Time to create a square knot to the side of the body where you first started off. Now back up this square not with an overhand knot on each end.
- If you have any leftover rope at this point, you can just tuck it into one of your pockets. However, you can use less rope for future reference.
- Remember that first wrapped part of the Swiss Seat? Attach a carabiner through it! Do the same for the wrap with the square knot.
- Make sure that the gate is actually facing you, otherwise, it will just rub on the rope.
Just in case you’re still a bit confused, I did some research and found a very useful video that details each step. When it comes to tying knots and emergency harnesses, visualization is key.
How comfortable is this rappel seat?
The Swiss Seat is not particularly comfortable, nor is it very flattering, especially for men. However, when compared to its alternatives, it offers a decent amount of support during a fall, which is why it is still the default choice of many climbers and climbing instructors.
Depending on your Swiss Seat rope length, you might end up with a bit too much slack at the end, and this could impact your comfort and performance somewhat. That’s why I always recommend tying up the harness and practicing repeatedly before attempting to use it in an actual emergency scenario.
Conclusion.
The Swiss Seat is a dependable emergency rappelling harness, and it’s not the most difficult rappelling knot to pull off. However, keep in mind that this technique should only be employed if you have no other choice. These days, there are plenty of affordable rappelling harnesses available, all of which provide better protection and comfort.
Military personnel still use the Swiss Seat regularly as part of training missions and actual rescue operations. Apart from allowing them to rappel from heights in an emergency situation, the Swiss Seat can also be used to transport an injured victim to safety. Generally, these techniques are employed by experienced climbers, which is why I wouldn’t advise you to attempt it as a beginner. It’s not that you wouldn’t be able to rappel with it, but messing up a single step during the tying process could put your life at risk. For more information about rappelling knots and how to tie them, make sure to visit my comprehensive guide right here.
As always, if you have anything that you would like to add, or if you’d just like to share your own experience with improvised rappel harnesses, don’t hesitate to get in touch.
Until then, stay safe and enjoy the view!


