Here’s everything you need to know about rappelling from a tree.
Using a tree as an anchor: now that’s a risky proposition. Can it work, though? In my experience, it can, as long as you pick the right tree for the job. In this article, I’m going to tell you exactly what to look for if you decide to practice rappelling from a tree. Tree thickness is obviously of paramount importance, but there are other things to look out for when picking your natural anchor.
Rappelling from a tree basically involves using a tree as a natural anchor. Make sure to carefully analyze the tree trunk’s thickness, check if it’s alive or dead, and have a look at its surroundings in order to make sure that its roots are strong enough.
Once you are completely certain that the tree can support your weight, you can go ahead and rig an anchor on it. Still, why would you want to rappel off a tree anyway? Well, sometimes you don’t really have a choice.
I remember one of my recent hiking trips, which involved a route that I wasn’t completely familiar with. Sure enough, we had some trouble finding the trail, and in order to reach it, we had to rappel down some steep valleys. Since there were no sturdy rocks around to use as natural anchors, we had to resort to trees. However, as I mentioned above, not just any tree will do.
How to rig an anchor in order to perform rappelling from a tree.
There are different ways of doing this, but it all depends on your particular situation, and whether you’re going back to retrieve the rope or not.
If you need to use the full length of your rope, or if you have to go down and come back up, I would recommend going for a Tensionless Hitch knot. A Tensionless Hitch is an anchor knot that can be used for both rappelling and rope rescue. What makes this knot stand out among all others is that it boasts a 100% efficiency rating, which means that its strength is equal to the strength of the rope.
How do you tie a Tensionless Hitch?
You start off by wrapping your rope 3 or 4 times around the tree. Afterward, create a Figure 8 Loop and attach a carabiner. Wrap the rope around the tree, and just clip the carabiner to the standing end. Keep in mind that you should have sufficient slack by the time you’re done. Also, if you notice a kink in the standing end, you’ve done something wrong, so just start over.
As an alternative, or if you want to exert a less rotational force on the tree, you could go with a Lighterman’s Hitch, but since I never used this one myself for tree rappelling, I can’t really tell how effective it is. If you know someone who’s done it before with a Lighterman’s Hitch, and you’re more comfortable with this particular knot, then you’re good to go.
Rigging the anchor.
- If you want to use the simplest anchor possible, you could tie your rope around the tree using a figure-8 follow-through knot, but just remember to leave out a three-inch tail.
- For the second step, you’ll need three 1-inch nylon webbing slings, and each sling needs to be tied around the tree before being threaded with two rappelling rings. You can now thread your rope through these rings.
- Next up you’ll need a nylon sling, preferably a 48-inch one, which should be doubled up and tied with an overhand knot. Now you can lock your carabiner into the rope.
- Last but not least, you should use a double fisherman’s knot to tie up the ends of a cordelette thus creating a large loop. Now double the cordelette and tie it around the tree. Tie up a figure 8 loop and clip your carabiner to it.
If you don’t know how to tie some of the knots I mentioned above, make sure to check out my article about the best rappelling knots and how to tie them. It will help you familiarize yourself with some of the most important ones.
How to make sure that the tree is strong enough for rappelling.
Now that you know exactly how to set up your rappel, it’s time to have a good close look at the tree itself and its surroundings. I don’t have to tell you what could happen if you pick the wrong tree. Your natural anchor will fail, and you will fall. You don’t want to fall. That doesn’t mean that you have to spend hours looking for the sturdiest tree around.
Sometimes, the trees that you have at your disposal might not even look that old or sturdy, but that doesn’t mean that they can’t serve as an anchor. Knowing what to look for can make all the difference, as it can save you time while giving you confidence.
Take a good look at the tree trunk’s diameter.
Generally speaking, you should keep an eye out for a tree with a thick trunk. One that would be sturdy enough to hold your weight and more. Some climbers settle with a trunk diameter of 5 inches, but I really wouldn’t recommend putting your life on the line like that. Fortunately, you don’t have to look for the oldest tree in the forest either, as there are a few simple rules that can help you find a good tree in a matter of minutes.
- Surely you have a helmet with you, right? Take it off and find a tree trunk that has the same diameter as your helmet. That shouldn’t be too hard to find, and the comparison shouldn’t be hard to do.
- Use the “thigh rule,” which is probably the most popular way of measuring a tree trunk in this situation. Basically, put your leg next to the tree and see if it’s as thick as your own thigh. Measurements can vary greatly, of course, and I personally don’t use this rule because I have relatively thin thighs. However, this method should work for most people.
- Another method that works sometimes involves using your feet as measuring tools. Just check if the base of the tree trunk is as long as your foot. If your feet are rather large, however, this might not be the best tool to use.
If you ask me, the helmet method is probably the one I’d rely on the most, as it uses an actual object as a measuring tool instead of a body part.
Analyze your surroundings.
Not all trees are created equal, and not all trees are strong enough to hold your weight, even if they might appear so at a glance. That’s because the environment in which a tree grows plays a key role in its strength, both in terms of trunk sturdiness and root depth. To make things clearer for you, studies have shown that trees growing in windy environments tend to have stronger roots when compared to trees that grow in calmer surroundings.
What does this mean for you? It means that you need to pay close attention to your location and learn about the local wind patterns and wind storms. If the area is frequently battered by strong winds, chances are the trees in that area are probably stronger than they appear. That doesn’t mean that you should just rig your rappel on a thin tree. It’s just that you might get away with rappelling from a thinner tree if you can’t find one that’s as thick as your helmet or thigh.
As far as the roots are concerned, humidity is what you need to look out for. Trees growing in wet climates don’t need to dig their roots very deep in the ground to find water. Therefore, their roots are not as strong as those of trees from the drylands. The East Coast is notoriously humid, for example, so if you find yourself rappelling from a tree over there, make sure that you’re doing it from a thick and sturdy tree.
These are all just general guidelines, of course. You’re not a tree expert, and you probably won’t be able to determine a tree’s root strength just by looking at it. How could you? However, I do believe that it’s better to know these things just in case. The more informed you are, the better your chances are to get home safely at the end of the day. So if the tree that sits in front of you doesn’t check all the right boxes, or if you have any doubts whatsoever regarding its reliability, just look for another one even if it takes a few minutes longer to get down.
Check if the tree is actually alive.
This final step is just as important as the other three. Actually, the trunk’s thickness and root strength won’t matter much at all if the tree itself is long dead. If the tree that you’re trying to rappel from is old and dried out, it could easily snap as you put pressure on it. Therefore, it’s up to you to determine the tree’s liveliness. Fortunately, this is not a particularly difficult process.
Look at the leaves. If they are lush, green, and young, then there’s a very good chance that your tree is alive and well. However, do watch out for leaves that are showing signs of age, or leaves that are about to fall. Leaves that have too much insect damage can also indicate that something might be wrong with the tree. Also, a strong, healthy tree should not ooze sap.
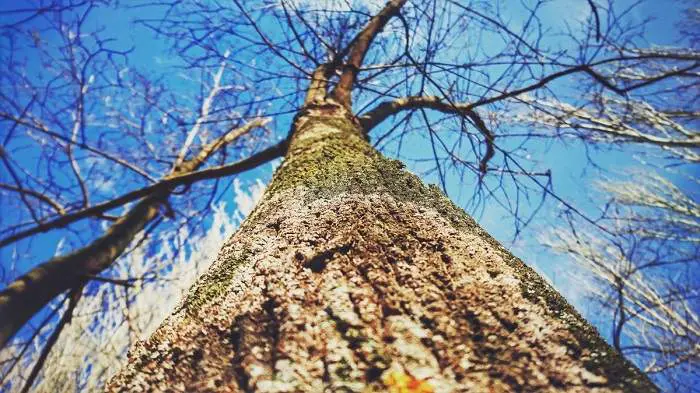
The most difficult time to tell if a tree is alive or dead is in early spring, just after winter is over, and also in late-fall when all of its leaves are already gone. In this case, have a look at the bark of the tree, and make sure that it doesn’t peel. The presence of fungi on the bark is cause for concern, but if the tree just has some moss on it, there’s nothing to worry about.
A quick giveaway that a tree is dead or about to die off completely is the presence of holes all over its trunk and branches. Too many bugs on the inside of the tree is also a clear sign of decay, so just move on to the next one if the tree you were about to rappel from shelters an insect colony.
Conclusion.
I hope that this quick guide has helped you get a better sense of what it means to rappel from a tree, what are the risks involved, and how to overcome them. Using a tree as a rappel anchor is not a bad idea if you’re fresh out of options. As long as you don’t go for a particularly weak specimen, and your gear is in good condition, you’ll be able to rappel down that steep slope in no time at all.
As always, if you have any suggestions that you would like to add, or if you would just like to share your own experiences, feel free to get in touch.


