How to rappel? Here’s a step-by-step introduction.
Learning how to rappel should be very high on your priority list if you’re thinking about practicing this awesome yet dangerous activity. Admittedly, if you want to save a lot of wear on your fixed anchors and still get down safely and quickly after a rewarding climb, rappelling is definitely the best way to go. However, there are certain things that you need to be aware of before starting to rappel. I’m here to give you a few tips and general guidelines, so that you may practice this controlled descent safely.
This is especially important given the number of accidents that have been reported these past few years. It may look easy when you see someone else doing it, but when you’re rappelling yourself, things can get complicated quick. Before attempting any of the following techniques, make sure that your ropes are set up properly and that they will reach the next anchor. Also, the ends should be knotted properly, or they should touch the ground below.
Let’s get started with this step-by-step guide to rappelling, shall we?
Check the ropes and the rappel anchor.
The first thing you need to do is check your rappel anchor and make sure that your ropes are set up nicely and safely. Moreover, an anchor tether and a backup are required for this step, as you’ll need to clip directly into the anchor. Then use a locking biner to clip your rappel device to your belay loop, but wait a bit before locking it completely. Just pull up using both strands of rope for just a few feet, but keep in mind that this won’t be a walk in the park.
Ideally, you should have a partner with you that can step on the rope in order to make it easier for you to clip thus creating a slack. While this is one of the easiest steps on the list, it’s also one of the most important ones, as it sets you up for what’s to come while making sure that you’ll be safe for the descent.
Friction grooves.
Using the slack that I mentioned above, you should make a pair of bights in each strand before pushing them through your device’s openings. If your device is equipped with friction grooves, you need to make sure that the section of the rope that leads to the ground comes out through them. This friction groove side should always be located on your dominant side.
Last but not least, keep the biner on your belay loop and clip it through the device and rope before locking it. You are now ready to move on to step three, but just in case you haven’t gotten the hang of it just yet, it’s always a good idea to start over until you get everything just right. When it comes to rappelling, rushing is never a good idea.
Check if the rappel is set up properly.
In this step, pull the brake strands up and through your device as much as you can before letting the rope drop. In order to lift your body upwards, just stand higher or pull up on the anchor until you’re sure that you are weighing the rappel setup instead of the tethers that go up to the anchor. This is an incredibly important step, as it allows you to check if your rappel was set up properly.
If it is not, then it will not hold your weight, which means that you’ll have to start over. That might not sound like much fun, but we’re rookies here, and we need to have a firm grasp on the basics before we can move on to the actual fun stuff.
Check the ropes and the biner.
You’re halfway through, and you’re doing great so far, but there are still a few other things that we should cover in this basic guide. For example, this would be a very good time to check if both strands of rope are threaded through the device. Moreover, pay some attention to the biner, and check if it is clipped through your device and both strands of rope.
Most importantly, the biner needs to be locked, so you should check that one more time as well. If you’re rappelling with a partner, ask your partner to check it. We suggest always verifying each other’s equipment from time to time, especially if there’s a beginner in the group.
Learn how to rappel using the auto-block.
This step involves setting up your auto-block, which is a very important part of rappelling equipment. We’ll cover each and every piece of rappelling gear in detail in another article, but for now, just make sure that your auto-block wraps around both strands of rope below the belay device. The biner should still be locked at this point. Just in case you’re not familiar with an auto-block, it’s basically a rappel backup. It’s sometimes referred to as a “third hand,” and it can definitely save you if you end up in a tricky situation.
For example, if you ever end up losing control of your rope, the auto-block will tighten and prevent you from falling. One potential problem is that if your leg loops have auto-doubled-back buckles, the auto-block could open up the buckle when it comes under some weight. The solution is clipping the biner to the inside of the leg loop-waist connector.
Moving down.
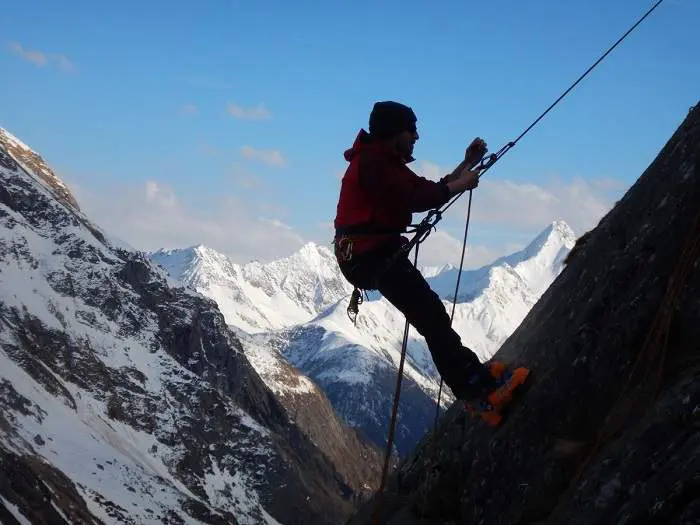
By this point, you should be sure that you’re properly clipped in, which means that you can actually move down. Get a firm hold on the brake strands in a locked-off position, and then just undo the tethers that link you to the anchor. Now focus on the brake side of the rope over the auto-block and put your second hand on it.
Now feed the rope up through the belay device with your lower hand. Prevent the auto-block from tightening up by moving it down the rope with the top hand as you descend.
Getting the hang of it.
So now you’re rappelling, and you’re quickly realizing how fast you need to feed the rope in order to descend at your desired speed. This may take a bit of getting used to, but it’s generally something that you can get the hang of after a few rappelling adventures. It is important to pace yourself in order to make sure that you won’t lose control. Keep going down until you’ve managed to clip safely into the next anchors or on the ground.
At that point, you can unclip the biner from the device and ropes and just clip the device on its own before pulling it free from the ropes. This pretty much completes our guide on starting to rappel.
Now you’re a few steps closer to rappelling safely and securely. Just make sure that you follow the steps exactly as described, and just in case you need a bit of extra information, we’re going to attach a video showing off one of the most reliable knots for rappelling, the Prusik Knot.


